Difference between revisions of "AnyWave:TimeFrequency"
(→Setting parameters for the plug-in) |
(→Setting parameters for the plug-in) |
||
| Line 24: | Line 24: | ||
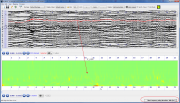
In our example, we have selected only one channel, so one Time/Frequency representation will be computed and one Other channel will appear in the bottom view. | In our example, we have selected only one channel, so one Time/Frequency representation will be computed and one Other channel will appear in the bottom view. | ||
| − | [[File:Image_4.png]] | + | [[File:Image_4.png|thumb|Time/Frequency channel TF_A125 appears in bottom view]] |
Notice the widget that appeared in the bottom right corner of the main window. This indicates that a process is currently active and Idle. In our case, it is the Time/Frequency process. | Notice the widget that appeared in the bottom right corner of the main window. This indicates that a process is currently active and Idle. In our case, it is the Time/Frequency process. | ||
The process will be updated by AnyWave any time the user browse the traces, providing a synchronous representation of the Time/Frequency. | The process will be updated by AnyWave any time the user browse the traces, providing a synchronous representation of the Time/Frequency. | ||
Revision as of 14:35, 1 September 2014
How to use the plug-in
You must first select one or more channels before launching the plug-in. To select channels you should click on the corresponding view once, to set focus on it. Then, press and hold the Selection key and clic on channels you want to select. You can also click and hold the mouse button and then drag to easily select several channels at once.
As shown by the picture below, ensure that a second view is active by selecting Split Horizontically. Click on the Eye button to set the channels type filters. The Time Frequency plug-in will create channels of type Other, so be sure that the Other type is set to be displayed in the corresponding view.
Launch the plug-in from the Menu
Setting parameters for the plug-in
There are few parameters to set:
- Oscillations is a parameter used in the computation of the Wavelet.
- Min. Freq. is the minimum frequency for computation. Default is 5Hz which means the time/frequency representation will start at 5Hz.
- Max. Freq. is the maximum frequency for computation. (The higher the longer)
- Step or Pas is the step in Hertz for computation. Default is 1Hz which means that the computation will be done with a 1Hz step between minimum and maximum frequencies.
- Baseline area : This parameter allows using a marked area as a baseline. A Time/Frequency representation of the marked area will be computed and used as a baseline for the other computation.
The default is set to No Baseline so the selected signals will be computed with no baseline.
To use a baseline, first mark an area using the Add Marker feature of AnyWave and then relaunch Time/Frequency process.
When all is ready, click on OK to launch the process.
In our example, we have selected only one channel, so one Time/Frequency representation will be computed and one Other channel will appear in the bottom view.
Notice the widget that appeared in the bottom right corner of the main window. This indicates that a process is currently active and Idle. In our case, it is the Time/Frequency process.
The process will be updated by AnyWave any time the user browse the traces, providing a synchronous representation of the Time/Frequency.


